How to Optimize Your Workshop Layout for Better Flow (Complete Auto Repair Shop Guide)
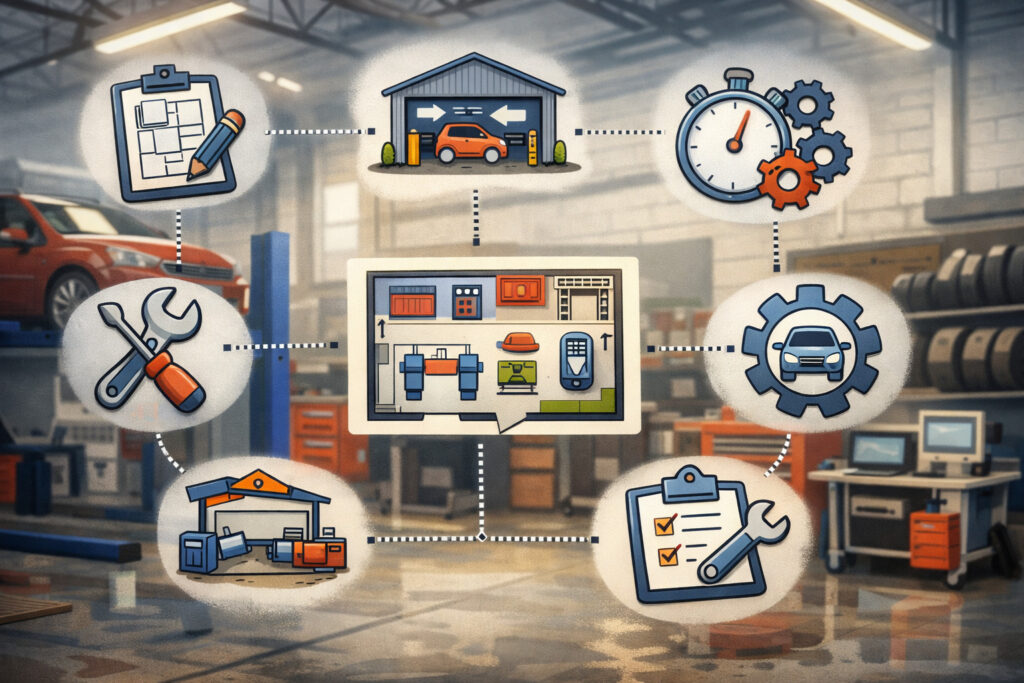
If you want to Optimize Your Workshop Layout, you’re really trying to solve a simple operational problem: how do we move vehicles, technicians, tools, parts, and information through the shop with less friction?
This workshop layout optimization guide is built for owners and service managers who want to improve workflow in your auto repair workshop through practical, measurable changes—not a vague “clean it up” lecture.
Done right, auto repair shop layout planning reduces wasted steps, clarifies responsibilities, shortens cycle times, and makes the shop feel calmer even on heavy days.
Layout matters because it affects every minute of labor you sell. If technicians walk too far for tools or parts, if cars get parked in the wrong places, or if dispatch is constantly interrupted, your shop loses time in tiny pieces all day long.
Those pieces don’t show up as a single failure. They show up as “we’re always behind,” comebacks due to rushed work, and a constant sense of congestion.
Common flow problems are easy to recognize:
- Vehicles block each other, especially near the entrance or alignment rack
- Parts are “somewhere,” and techs stop work to hunt or wait
- Advisors and techs play phone tag because the handoffs aren’t clear
- Diagnostic work competes for the same bays as long repair jobs
- Tools end up on carts or floors because storage isn’t close enough
- Safety lanes become storage lanes, inviting accidents and violations
The goal isn’t perfection. The goal is a shop that moves smoothly, where technicians spend more time wrenching and less time navigating chaos.
Understanding Workshop Flow in an Auto Repair Shop

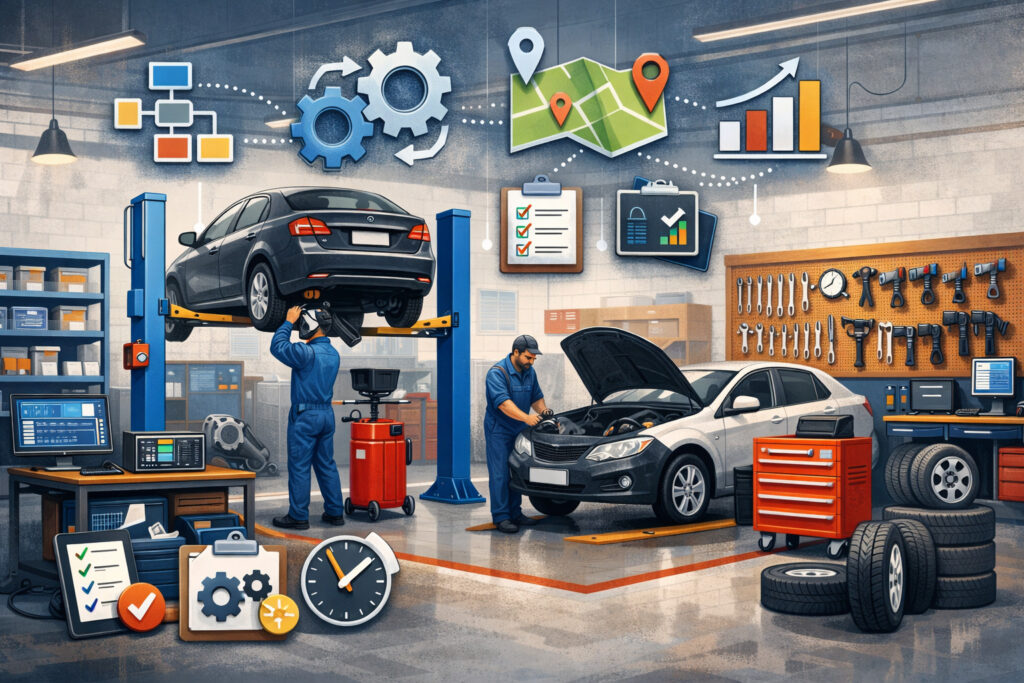
Workshop flow is the practical reality of how work moves through your facility. It includes vehicle movement, technician movement, parts movement, and communication movement. If any one of these flows is sloppy, the whole operation slows down. The best automotive shop workflow design treats the shop like a system, not a collection of bays.
In an ideal workflow, everyone can answer these questions instantly:
- Where does the vehicle go next?
- Who owns the next step?
- Where are the tools, parts, and information needed to start?
- What will block this job—and how do we prevent it?
Flow isn’t just physical. It’s also procedural. A shop can have wide aisles and still struggle if dispatch interrupts technicians every five minutes. The physical layout should support a repeatable process: intake → triage/inspection → estimate/authorization → repair → quality check → delivery.
Most bottlenecks aren’t dramatic. They’re recurring:
- One shared lift that everyone needs at 10 a.m.
- A parts counter that becomes a crowd
- A single narrow pass-through where vehicles must reverse and shuffle
- Alignment rack positioned in the deepest corner, forcing cross-traffic
When you define workflow clearly, you can see where the shop is “fighting itself.” Then layout changes become obvious and justifiable.
The Vehicle Journey: Intake to Delivery, Step by Step
A vehicle doesn’t just “come in and get fixed.” It takes a journey through multiple decision points. Mapping that journey is the foundation of vehicle intake and dispatch flow improvements and service bay layout efficiency.
A typical vehicle journey looks like this:
- Arrival and parking (customer drop-off or tow-in)
- Check-in (keys, concerns, mileage, photos, authorization)
- Triage staging (quick sort: waiting/diagnostic/repair/parts hold)
- Initial inspection (digital inspection, safety items, upsell opportunities)
- Estimate and authorization (advisor + customer)
- Repair execution (assigned bay, tools, parts, service info)
- Quality control (road test, final inspection, reset indicators)
- Cleanup and paperwork (floor mats, sticker, notes)
- Delivery staging (ready line, pickup coordination)
Your layout should make that journey nearly “one-directional.” If vehicles have to cross paths, reverse frequently, or get moved multiple times due to blocked access, you’re losing capacity and creating risk.
A useful rule: every unnecessary vehicle move is a hidden tax. It consumes time, ties up a driver, increases damage risk, and creates confusion about job status.
How to Identify Bottlenecks Without Guessing
Bottlenecks are rarely where people complain the most. They’re where work quietly stacks up. To reduce shop bottlenecks, look for queues—physical or digital—that repeat daily.
Start with simple observation:
- Where do cars “wait” most often?
- Where do technicians “pause” or wander?
- Where do advisors repeatedly go to find answers?
- Which bays always feel overloaded, while others sit underused?
Then collect a few real metrics for one week:
- Average number of vehicle moves per RO
- Average steps from bay to parts pickup for common jobs
- Time from check-in to technician start
- Time from “parts ordered” to “parts in hand”
- Time spent waiting on lifts, alignment rack, or diagnostic equipment
You don’t need fancy software to spot patterns. A clipboard, a simple tally sheet, and 30 minutes of daily review will show you where your layout and process are fighting each other. The key is to measure reality, not intentions.
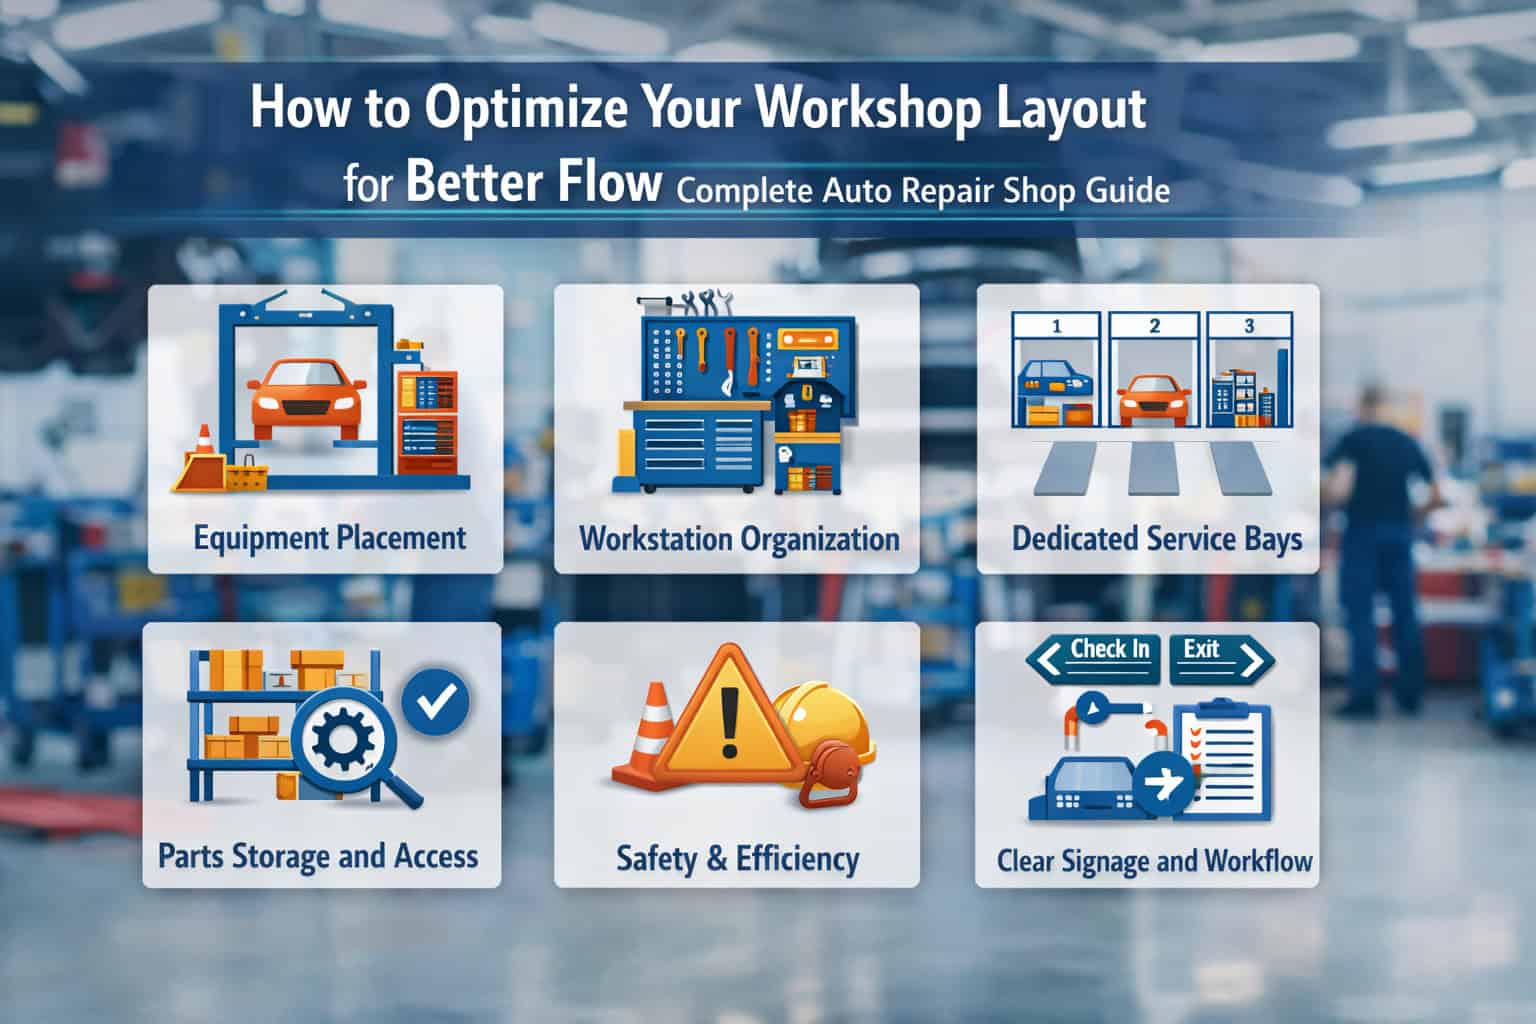
Core Principles of Workshop Layout Optimization

The strongest layout plans use a few repeatable principles. These principles apply whether you have 2 bays or 20, whether you’re a general repair shop, a tire-heavy operation, or a specialist. The goal of Optimize Your Workshop Layout isn’t to chase a trendy design—it’s to build a facility that supports predictable throughput and consistent quality.
The core principles include:
- Straight-line vehicle flow whenever possible
- Technician movement optimization to reduce wasted steps
- Shop equipment placement strategy based on frequency of use
- Safety and compliance baked into traffic lanes and storage
- Lean shop layout principles that reduce variation and rework
When these principles work together, the shop becomes easier to manage. You’ll see fewer “where is it?” questions, fewer blocked vehicles, and fewer interruptions.
Remember: layout decisions are permanent compared to staffing changes. A bad layout makes good people look slow. A good layout makes average days feel manageable.
Straight-Line Vehicle Flow and Clear Staging Zones
Straight-line flow is the idea that vehicles should move forward through the process with minimal backtracking. That doesn’t mean every shop can be a perfect rectangle. It means you design the path and the staging areas so cars don’t get trapped.
A practical “straight-line” approach uses defined zones:
- Arrival/Drop-off zone: clearly marked, easy entry/exit
- Triage/Quick-check zone: 1–2 spaces near the front
- Active repair bays: grouped for shared resources
- Specialty bays: alignment, diagnostic, tire
- Ready-for-delivery line: near the exit and service desk
Text diagram (simple “forward flow” layout):
- Front entrance → Drop-off → Triage → Repair Bays → QC/Road Test Exit → Delivery Staging → Customer pickup
Even in tight shops, you can create “forward flow” by assigning certain parking spots as staging lanes and enforcing them daily. The biggest win comes from reducing random parking. Random parking is how shops accidentally create dead ends.
Minimize Technician Walking Distance Without Sacrificing Safety
Technician walking is one of the easiest wastes to spot and one of the hardest to fix without a plan. Walking isn’t always bad—some movement is healthy. The problem is repeated, unplanned walking for the same items: tools, parts, hardware, service information, approvals, and trash disposal.
To improve technician movement optimization, focus on the “top 20” items technicians touch all day:
- Common hand tools and specialty sockets
- Fluids and consumables
- Hardware (clips, fasteners, clamps)
- Scan tool access and battery support
- Work orders, tablets, printers, labelers
Practical layout moves include:
- Place consumables and hardware within a short walk of every bay
- Use satellite tool storage (small cabinets) for high-use items
- Add parts pickup windows or drop shelves closer to bays
- Move trash, used oil, and recycling points so techs don’t cross traffic lanes
Safety matters here. Don’t “optimize” walking by creating trip hazards or narrowing emergency routes. The best shops reduce steps while keeping wide, clearly marked pathways.
Equipment Placement Strategy, Utilities, and Compliance
Equipment placement is where many shops lose money quietly. If your tire machine is across the shop from tire storage, you’ll waste time. If your alignment rack is placed where cars must cross the busiest lane, it becomes a daily bottleneck. If compressed air drops aren’t where techs work, hoses become hazards.
Use a frequency-and-impact lens:
- High-frequency equipment goes central and accessible
- High-impact equipment (alignment rack, ADAS calibration) needs protected space
- Noisy/dirty processes should be zoned away from clean work and customers
Place equipment based on work types:
- Alignments near suspension bays and tire service
- Diagnostic bay near advisors (for quick approvals) but not in the main traffic pinch point
- Fluid services near bulk tanks and disposal points
- Welding/fabrication in a separated area with fire controls
Also consider compliance and safety:
- Marked pedestrian lanes
- Fire extinguisher access
- Clear egress routes
- Proper ventilation zones
- Chemical storage requirements
- Adequate lighting and slip-resistant flooring near wet work
A layout that ignores safety becomes expensive through incidents, rework, damaged vehicles, and potential violations.
Auto Repair Shop Layout Planning Basics That Actually Work
Good planning converts “we should reorganize” into concrete decisions. The basics sound simple—bay spacing, storage placement, customer area flow—but small details change daily efficiency.
This section focuses on the fundamentals of auto repair shop layout planning and practical auto repair shop floor plan ideas you can implement without rebuilding your whole facility.
Planning basics should answer:
- How many vehicles can we service at once without blocking?
- Where do parts and tools live so techs can start quickly?
- Where do vehicles wait without interfering with active work?
- How do customers move without entering unsafe zones?
- Where are the specialty functions placed to avoid cross-traffic?
A shop that plans these intentionally will outperform a bigger shop that “figures it out as we go.”
Service Bay Spacing and Service Bay Layout Efficiency
Service bays are your revenue engine, but cramming them together often reduces throughput. Overcrowding causes slow vehicle positioning, tool clashes, and safety hazards. Service bay layout efficiency improves when bays have room for the work and the vehicle movement around them.
Bay spacing depends on:
- Vehicle types (compact vs trucks)
- Lift type (2-post vs 4-post vs scissor)
- Door swing and hood access
- Tool carts and specialty equipment clearance
Practical guidelines that usually hold:
- Ensure enough lateral space for doors to open without hitting cabinets
- Maintain clear routes around lifts for jacks, drains, and carts
- Avoid placing shared equipment directly behind lift posts (creates collisions)
- Keep at least one “wide bay” for larger vehicles and complex jobs
Text diagram (two-bay module idea):
- Bay A | Shared consumables cabinet | Bay B
- Parts drop shelf behind both bays (but not in traffic lane)
- Shared air and power drops centered between bays
The goal is a repeatable bay module. When bays are inconsistent, technicians waste time adapting each time they move stalls.
Tool and Parts Storage Positioning for Fast Starts
If technicians can’t start a job quickly, you lose production before the wrench even turns. Tool storage optimization and parts positioning should reduce “search time” and “waiting time.”
A practical strategy is the “two-tier storage model”:
- Tier 1: High-use items near bays
- Fluids, consumables, common hardware
- Frequently used specialty tools
- Scan tool accessories and battery maintainers
- Tier 2: Bulk storage centralized but accessible
- Overstock fluids and filters
- Rarely used specialty tools
- Seasonal inventory
For parts flow, aim to keep parts movement short and predictable:
- Create a parts receiving area that doesn’t block the shop
- Add staging shelves by technician or RO
- Use a parts “ready” rack near dispatch, visible and labeled
- Place the core return bin near receiving, not in random corners
If you reduce travel and confusion, you reduce interruptions. That’s directly tied to automotive service workflow improvement.
Customer Drop-Off, Waiting Area, and Advisor Visibility
Customer areas are often treated as separate from the shop. Operationally, they’re connected. A drop-off setup that causes delays at peak times creates backlogs that ripple all day.
Design your front-of-house flow to support the shop:
- Dedicated drop-off spots with clear signage
- Easy key handoff and fast check-in process
- Advisor line of sight to triage/diagnostic bay if possible
- Waiting area that doesn’t interfere with intake traffic
If you can’t redesign walls, focus on functional improvements:
- A clearly marked “arrival lane” outside
- A staging spot for tow-ins that won’t block walkways
- A check-in station that keeps paperwork and tablet tools ready
- A standard process for photos and initial notes
When advisors can see what’s happening and techs aren’t interrupted by customer confusion, the shop stays on rhythm.
Step-by-Step: How to Optimize Your Workshop Layout Without Disrupting Production
This is the practical core of the workshop layout optimization guide. The biggest mistake shops make is trying to redesign everything at once. That approach causes downtime, confusion, and resistance. The best approach is to measure, pilot, then lock in improvements.
This process is designed to keep the shop running while you improve it.
Key outcomes to aim for:
- Fewer vehicle moves per RO
- Shorter time from check-in to start
- Less technician walking for common jobs
- Clearer staging and dispatch visibility
- Fewer interruptions and “where is it?” moments
Treat layout optimization as a project with a beginning, middle, and end—not a permanent argument.
Map Your Current Layout and Track Real Technician Movement
Start with a real map. It can be a printed floor plan or a hand sketch. The important part is accuracy and labeling.
On your map, include:
- Bays and lift types
- Toolboxes and major cabinets
- Parts area, receiving, and staging racks
- Alignment rack, tire machines, diagnostic equipment
- Waste disposal points (oil, coolant, trash, recycling)
- Entry/exit doors and vehicle lanes
- Advisor stations and customer paths
Next, measure technician walking in a simple way:
- Pick 3 common job types (oil service, brakes, diagnostic)
- For each job type, track one technician for one RO
- Note every trip: to parts, to toolbox, to service info, to advisor, to trash
- Count steps or time (even rough estimates help)
You’re looking for repeated trips that can be eliminated. For example:
- Three trips to the same cabinet
- Two trips to the printer
- Repeated advisor interruptions due to unclear status
This data prevents “opinions” from driving layout changes. It turns the conversation into problem-solving.
Identify Wasted Space, Reposition High-Use Tools, and Redesign Dispatch
Once you see movement patterns, look for wasted space:
- Corners filled with abandoned tires or cores
- Wide areas that become random parking
- Aisles used as “temporary storage” that becomes permanent
- Cabinets placed where doors can’t open fully
Then make small, high-impact changes first:
- Move consumables closer to bays
- Add a “top tools” cabinet centrally
- Create labeled staging shelves for parts per RO
- Relocate printers, labelers, and QC check sheets where they’re used
Dispatch is often the invisible bottleneck. If dispatch is disorganized, techs start late and stop often.
Improve dispatch physically and procedurally:
- Place dispatch where advisors can see bay status
- Create a clear “work ready” board (digital or physical)
- Provide a quick handoff space: keys, notes, parts status, approvals
- Reduce interruptions by standardizing how techs ask questions
Text diagram (simple dispatch + staging concept):
- Service desk → Dispatch station (with board) → Parts staging rack → Diagnostic bay entrance
- One dedicated walk path from dispatch to bays (no crossing vehicle lanes)
Finally, pilot changes before major renovations:
- Test a new parts staging location for two weeks
- Try a dedicated diagnostic bay for one month
- Temporarily tape floor markings for vehicle lanes and staging spots
If the pilot works, then invest in permanent changes.
Improving Workflow in Your Auto Repair Workshop Through Systems and Zones
Layout changes are powerful, but they work best when combined with better workflow systems. This is where automotive service workflow improvement becomes real. A shop can have a good floor plan and still struggle if dispatch is unclear, if approvals are slow, or if diagnostic work gets buried under repair work.
To improve workflow in your auto repair workshop, build repeatable zones and rules:
- Which jobs go where
- How work is assigned and started
- How parts are staged and verified
- How QC is performed and documented
Think of this as pairing your physical layout with your operational “operating system.”
Dispatch System Improvements That Reduce Stop-Start Work
Stop-start work kills productivity. Technicians lose rhythm when they’re constantly shifting tasks because parts aren’t ready or approvals aren’t clear.
Dispatch improvements include:
- Pre-assign bays based on job type and time requirements
- Only dispatch jobs that meet “ready to start” criteria
- Use a consistent status system: waiting/diagnosing/approved/in progress/QC/ready
- Schedule high-dependency equipment (alignment rack) like a resource, not a free-for-all
A practical “ready to start” checklist:
- RO created with clear customer concern
- Parts status confirmed or ordered
- Labor time estimated and bay planned
- Diagnostic time separated from repair time where needed
- Approval path defined (who calls, how, and when)
Physically, dispatch needs a home base:
- A quiet spot where advisors can think and coordinate
- Visibility into bay status
- Immediate access to keys, tablets, and printer
- A protected area that techs can approach without blocking customers
When dispatch is treated like a production control center, the shop stops reacting and starts controlling flow.
Digital Workflow Integration and Dedicated Diagnostic Bays
Digital tools don’t fix layout problems, but they reduce friction when paired with a smart layout. Tablets, digital inspections, photo capture, and messaging reduce back-and-forth trips if your shop supports them with charging stations, Wi-Fi coverage, and standardized usage.
Practical digital layout supports:
- Tablet docking/charging at dispatch and in bays
- Label printers near parts staging
- Screens visible to advisors showing bay status
- QR-coded tool checkouts for shared specialty tools
Dedicated diagnostic bays are one of the strongest flow improvements in many shops. Diagnostic work is different:
- It requires quiet focus
- It involves frequent advisor/customer communication
- It may not need a lift for the entire time
- It often blocks a bay while waiting for approval
A dedicated diagnostic bay should be:
- Near dispatch/advisors
- Equipped with scan tools, battery support, and basic tools
- Clear of heavy long-duration work
- Easy to move vehicles in and out without blocking repair lanes
If you can’t dedicate a whole bay, create a “diagnostic priority stall” during peak hours. The principle is the same: protect the diagnostic process so the shop doesn’t stall waiting for decisions.
Express Service Lanes and Quick-Turn Capacity Planning
Express service isn’t just for dealerships. Many independent shops benefit from a structured “quick-turn” process: oil services, simple maintenance, tire rotations, batteries, and light inspections.
Express success requires repair shop capacity planning and clear separation from heavy work. Without that separation, quick jobs get stuck behind bigger jobs.
Design an express lane with:
- One bay or stall near the entrance
- Dedicated consumables and filters nearby
- Clear job criteria (what qualifies as express)
- Quick parts access and a fast approval path
Text diagram (small shop express concept):
- Drop-off → Express stall (near entrance) → Quick QC → Delivery staging
- Repair bays deeper in shop for longer-duration work
Capacity planning means deciding how many hours of express work you can handle without hurting core repairs. Start small:
- Reserve 1–2 express slots per day
- Track whether they finish on time
- Adjust staffing and parts stocking based on demand
When express is designed intentionally, it reduces chaos, improves customer satisfaction, and protects your repair bays for higher-complexity work.
Using 5S and Lean Methods in Workshop Organization
A shop can’t maintain a good layout without discipline. That’s where 5S workshop organization and lean shop layout principles come in. These methods aren’t corporate buzzwords when applied correctly. They’re practical tools for keeping tools, parts, and workspaces in a predictable state.
The benefit of 5S is stability. Stability reduces errors, rework, and wasted motion. It also makes training easier because the shop becomes consistent.
Lean thinking in the shop focuses on removing waste:
- Motion (unnecessary walking and reaching)
- Waiting (parts, approvals, equipment access)
- Overprocessing (redoing inspections, duplicate paperwork)
- Defects (comebacks, missed steps)
- Inventory issues (missing parts, overstock blocking space)
Apply 5S in a way that supports technicians, not punishes them. The goal is to make the right way the easiest way.
Sort and Set in Order for Real Technician Efficiency
Sort means removing what doesn’t belong in the work area. In many shops, bays become storage units for old parts, broken tools, and “we might need it later” items. That kills flow.
Sorting actions that work:
- Red-tag broken/unused tools and remove them weekly
- Clear bay corners of stored inventory
- Establish a “quarantine shelf” for items awaiting decisions
- Eliminate duplicate junk containers that cause clutter
Set in order means placing items so they’re easy to find and return. This is where tool storage optimization becomes a daily advantage.
Set-in-order actions:
- Shadow boards for frequently shared tools
- Labeled drawers with consistent layouts across bays
- Standard placement for jacks, stands, drain pans, and chargers
- “Point-of-use” storage for consumables (where they’re used)
A practical rule: if a tech uses it multiple times per day, it shouldn’t require a long walk. Small cabinet additions and better positioning often outperform expensive remodels.
Shine, Standardize, and Sustain Without Turning It Into Policing
Shine is cleaning and inspection. In shops, cleaning is also preventive maintenance: it exposes leaks, damaged cords, worn hoses, and hazards.
Shine improvements:
- End-of-day bay reset checklist (2–3 minutes)
- Weekly deep clean of shared areas (alignment rack, tire zone)
- Clearly placed spill kits and absorbents
- Simple floor markings that stay visible
Standardize makes the layout repeatable. When every bay has different storage, different trash placement, and different tool patterns, technicians lose time adapting.
Standardize actions:
- One bay layout standard (where carts park, where chargers live)
- Consistent parts staging method (by RO, by tech, by date)
- Standard QC checklist location and process
- Standard lane markings and “no storage” zones
Sustain is where most shops fail. Sustaining doesn’t require yelling. It requires ownership and routines:
- Assign area ownership (not just management policing)
- Schedule a weekly 30-minute 5S walk
- Track one or two simple compliance indicators
- Reward teams for maintaining standards during busy weeks
When 5S becomes part of how work is done—not a special project—your layout improvements stick.
Common Workshop Layout Mistakes to Avoid
Many layout problems come from good intentions: adding more equipment, squeezing in one more bay, or using any empty space for storage. But the shop pays for those decisions every day. Avoiding common mistakes is often faster than building perfect solutions.
Mistakes to watch for include:
- Overcrowded bays that reduce usable working space
- Poor lighting and visibility, creating errors and slowdowns
- Parts storage too far from where parts are installed
- Ignoring safety pathways and turning lanes into storage
- Placing high-demand equipment in high-traffic pinch points
Fixing these doesn’t always require construction. It requires making operational decisions and enforcing them.
Overcrowded Bays, Poor Lighting, and “We’ll Just Put It Here”
Overcrowded bays are a classic example of false capacity. You might have “more bays,” but each bay becomes less productive due to congestion. When technicians can’t move carts or open doors freely, they work slower and take more risks.
Signs of overcrowding:
- Techs constantly move vehicles just to access tools
- Carts block doors and lift posts
- Shared equipment is always in the way
- “Temporary” storage stacks up in bay corners
Lighting is another overlooked issue. Poor lighting leads to slower work, missed details, and fatigue. It also affects inspections and QC.
Lighting improvements that pay off:
- Bright, uniform overhead lighting in bays
- Focus lighting for inspection areas
- Better lighting around alignment racks and tire zones
- Clear lighting in parts staging and receiving
The “we’ll just put it here” habit is the enemy of flow. Every time an item is placed randomly, it creates a future interruption. The fix is simple: define homes for things, and enforce “no home, no keep.”
Parts Storage Too Far, Broken Safety Lanes, and Misplaced Specialty Zones
Centralizing parts far from bays seems tidy, but it increases walking and waiting. Techs leave work to retrieve parts. Advisors get interrupted for status checks. The shop’s momentum breaks.
Better alternatives:
- Parts staging near bays by RO
- A runner system during peak hours
- Small “fast-moving parts” cabinet near the work area
- Clearly labeled shelves for each technician or bay group
Safety pathways are often ignored until there’s an incident. When aisles become storage, you create daily risk:
- Trips and falls
- Damaged vehicles from tight movement
- Blocked exits
- Violations during inspections
Mark pathways clearly and treat them as sacred. Use floor tape or paint. Place “no storage” signage where it matters.
Misplaced specialty zones also cause constant cross-traffic:
- Tire area should be near tire storage and balancing equipment
- Alignment rack should be accessible without crossing the busiest lane
- Diagnostic zone should be close enough for communication but protected from chaos
When you place specialty zones strategically, you reduce conflicts and make scheduling easier.
Real-World Before-and-After Scenario: Reducing Turnaround Time Through Layout Changes
A scenario helps turn theory into practice. Here’s a realistic example of how layout changes can reduce cycle time without claiming magic results. The point is to show the cause-and-effect chain.
Before: The Shop Feels Busy, But Work Stalls
Shop profile:
- 6 repair bays, 1 alignment rack, 1 tire machine area
- Parts storage in a back corner
- No dedicated diagnostic bay
- Dispatch happens at the front desk with constant interruptions
Symptoms:
- Vehicles moved 2–4 times per RO
- Alignment rack becomes a mid-day traffic jam
- Techs walk to parts area multiple times per job
- Diagnostic jobs occupy a lift bay while waiting for approvals
Daily reality:
- A brake job waits for parts because parts aren’t staged
- A diagnostic job blocks a bay while advisor calls customer
- Cars stack up near the entrance because there’s no triage lane
- Techs step around stored tires in the main aisle
After: Small Layout Changes That Unlock Flow
Changes implemented over 30 days:
- Created a triage staging zone near the entrance (2 marked spots)
- Assigned one bay as a diagnostic priority stall during peak hours
- Added a parts staging rack near the bays, labeled by RO
- Relocated fast-moving consumables to a central cabinet between bay pairs
- Marked vehicle lanes and no-storage safety paths with floor tape
- Moved alignment scheduling into dispatch (booked time slots)
Text diagram (after flow concept):
- Entrance → Triage spots → Diagnostic priority stall → Repair bays → QC spot → Delivery staging near exit
Operational results (realistic outcomes):
- Fewer vehicle moves because staging is defined
- Techs start jobs faster because parts are staged
- Diagnostic decisions happen faster because the process is protected
- Alignment is scheduled instead of fought over
- The shop feels less chaotic without adding staff
The most important outcome isn’t “more cars” overnight. It’s fewer interruptions, fewer stalls, and a more predictable day. That predictability is what allows productivity improvements to accumulate.
FAQs
Q1) How much space do I need per service bay?
Answer: It depends on vehicle mix, lift type, and tool cart usage. As a practical baseline, you want enough width for doors to open safely and for carts to pass without hitting lift posts or cabinets. If techs regularly move vehicles just to access tools or open doors, your bays are too tight or storage is placed poorly.
Q2) What is the best layout for a small auto repair shop?
Answer: Small shops benefit most from defined zones: a clear intake/triage spot, one flexible bay for diagnostic priority, and a predictable parts staging system. “Best” usually means minimizing vehicle backtracking and keeping high-use items close to where they’re used. Even one marked staging spot can reduce chaos.
Q3) How can I reduce technician walking time?
Answer: Start by tracking walking during a few common jobs. Then move high-use consumables, hardware, and shared tools closer to bays. Add parts staging shelves near the work area. Also reduce “information walking” by improving dispatch communication and using consistent digital messaging.
Q4) Does shop layout really affect profits?
Answer: Layout affects productivity by changing how much paid work gets done per hour and how often work is interrupted. It also impacts quality, safety, and cycle time. The financial impact is real, but it’s indirect—fewer delays, fewer mistakes, smoother throughput—not instant guaranteed profit jumps.
Q5) Should I separate diagnostic and repair bays?
Answer: If diagnostic work frequently blocks lift bays while waiting for approvals, separation helps. A dedicated diagnostic bay (or a priority diagnostic stall during peak hours) improves flow by protecting decision-making work from long repairs. It also reduces interruptions for technicians doing heavy repair work.
Q6) How often should I reassess my workshop layout?
Answer: At minimum, do a quarterly check-in and a deeper review annually, or whenever your car count, service mix, or staffing changes significantly. Reassess after adding major equipment or changing processes (like introducing express service or ADAS calibration).
Q7) Can layout changes reduce downtime?
Answer: Yes—especially downtime caused by waiting, searching, and unnecessary vehicle moves. Layout changes won’t fix every downtime issue, but they can eliminate common daily delays like long parts walks, blocked equipment access, and confusing staging.
Q8) Where should I place the alignment rack?
Answer: Place it where vehicles can access it without crossing your busiest lane and where alignment work can be scheduled without blocking general repair flow. Ideally it’s near suspension-related bays and tire equipment, with enough space for setup and safe movement.
Q9) How do I create better vehicle intake and dispatch flow?
Answer: Define a drop-off lane and a triage staging area near the entrance. Standardize check-in steps and create a dispatch control point where work is assigned only when “ready to start.” Physically support this with clear lane markings and visible staging racks for parts and keys.
Q10) What are the most common bottlenecks in auto repair shops?
Answer: Common bottlenecks include shared equipment (alignment, specialty tools), parts delays and staging confusion, diagnostic work waiting on approvals, and clogged vehicle lanes near entrances. Dispatch interruptions and unclear job status also create hidden bottlenecks.
Q11) How do I organize tools so techs actually keep it organized?
Answer: Use 5S principles: remove what doesn’t belong, assign clear homes, label everything, and standardize bay setups. Make it easy to return tools by designing storage around workflow. Ownership and routines sustain it better than strict policing.
Q12) What if my building layout is awkward or has dead ends?
Answer: You can still improve flow by defining staging zones, setting one-way movement rules where possible, and preventing random parking. Floor markings and enforced “no storage” lanes can make awkward layouts workable. The goal is predictability, not perfection.
Q13) Should I add an express lane?
Answer: Add express only if you can protect it from being swallowed by heavy repairs. Start with limited express slots and a dedicated stall near the entrance. Track completion times and adjust. Express works best when consumables are stocked nearby and approvals are fast.
Q14) What’s the fastest layout change that usually makes a difference?
Answer: Creating a labeled parts staging system near bays and marking clear vehicle lanes/staging spots often produces immediate improvement. These changes reduce confusion and interruptions without requiring construction.
Q15) How do I know if a layout change worked?
Answer: Measure a few simple indicators before and after: vehicle moves per RO, time from check-in to technician start, technician walking time for common jobs, and number of interruptions related to parts or approvals. If those improve, the change worked.
Conclusion
To Optimize Your Workshop Layout, focus on flow—not aesthetics. Your shop’s layout should support straight-line vehicle movement, short technician travel paths, predictable parts staging, and a dispatch system that prevents stop-start work.
The best improvements are often the simplest: marking lanes, defining staging zones, relocating high-use supplies, and protecting diagnostic and alignment capacity from daily chaos.
Layout optimization is not a one-time event. It’s an operational habit. When you treat layout as a tool for better execution—paired with 5S discipline and lean thinking—you reduce bottlenecks, improve shop productivity, and make the day more manageable for everyone.
What matters most is that your layout matches your process. If your process is unclear, the layout will never feel right. If your process is strong, the layout becomes a force multiplier.