
Workshop Layout Optimization Strategies
A workshop can have skilled technicians, strong customer demand, reliable equipment, and steady repair orders, yet still lose time and money because the layout does not support the way work actually moves.
That is why workshop layout optimization matters. It helps owners and managers arrange the physical space so vehicles, people, tools, parts, equipment, paperwork, and customer interactions move with less friction.
Workshop layout optimization is not just about making a shop look cleaner. It affects technician productivity, repair cycle time, bay utilization, safety, inventory control, customer experience, and profitability.
A poorly planned repair shop layout can create blocked vehicles, wasted walking, misplaced parts, crowded service bays, unclear job status, poor customer flow, and safety risks. A well-planned automotive workshop layout helps each job move from drop-off to inspection, repair, quality check, and pickup with fewer delays.
This guide explains practical workshop layout optimization strategies for auto repair shops, tire shops, detailing businesses, collision repair shops, fabrication workshops, equipment repair businesses, and growing automotive operations. The goal is to help shop owners make smarter layout decisions without overcomplicating the process.
What Is Workshop Layout Optimization?
Workshop layout optimization is the process of arranging a workshop floor plan so daily work can move safely, smoothly, and profitably. It includes the placement of service bays, lifts, diagnostic areas, tool storage, parts storage, equipment, customer areas, parking, safety zones, dispatch areas, and job staging spaces.
A good workshop layout design starts with workflow. Owners should ask how vehicles enter the property, where customers drop off keys, where inspections happen, how parts reach technicians, where vehicles wait for approval, where completed jobs are staged, and how customers pick up vehicles. Every layout decision should support that movement.
For example, a shop may have enough square footage but still feel crowded because vehicles waiting for parts are parked in active bays. Another shop may have a large parts room but lose time because fast-moving filters, fluids, or hardware are stored far from the technicians who need them. In both cases, the issue is not only space. It is how the space is organized.
Workshop layout optimization also connects to business performance. If technicians spend extra time walking, searching, waiting, or moving vehicles, labor efficiency drops. If bays are blocked by inactive jobs, shop capacity drops. If customers cannot find the service advisor desk or pickup area, the customer experience suffers.
Pro Tip: Before buying new equipment or adding more bays, map your current workflow. Many layout problems can be improved by changing staging rules, storage locations, floor markings, or equipment placement before making major investments.
Why Workshop Layout Planning Matters
Workshop layout planning affects nearly every part of shop performance. It determines how quickly work starts, how easily technicians access tools, how efficiently vehicles move, how safely people walk through the facility, and how clearly managers can see job status. Layout is not just a facilities issue. It is an operations issue.
A strong layout supports technician workflow by keeping high-use tools, parts, fluids, diagnostic equipment, and service information close to where work is performed. This reduces wasted motion and helps technicians stay focused on paid repair work.
Small improvements can add up quickly. If each technician saves several minutes per job by avoiding unnecessary trips across the shop, the business may complete more work with the same team.
Workshop layout planning also affects bay utilization. A service bay should be used for active work, not as long-term parking for vehicles waiting on parts, approvals, or pickup. When a vehicle occupies a bay without active labor, it limits shop capacity and can delay other jobs.
Customer experience matters too. A confusing customer drop-off, unclear parking layout, crowded waiting area, or disconnected service advisor desk can make the shop feel disorganized. Customers may not see the back-end workflow, but they notice delays, unclear communication, and inconvenient pickup.
For broader operational planning, resources on daily repair shop operations can help owners connect layout decisions with scheduling, inspections, communication, and workflow routines.
Layout also supports cash flow. Faster repair cycle time can improve invoice completion, parts turnover, and daily production. Better storage reduces lost inventory. Safer movement can reduce accidents, damage, and downtime. In short, the right repair shop layout helps the business use its people, equipment, and space more effectively.
Signs Your Workshop Layout Needs Improvement
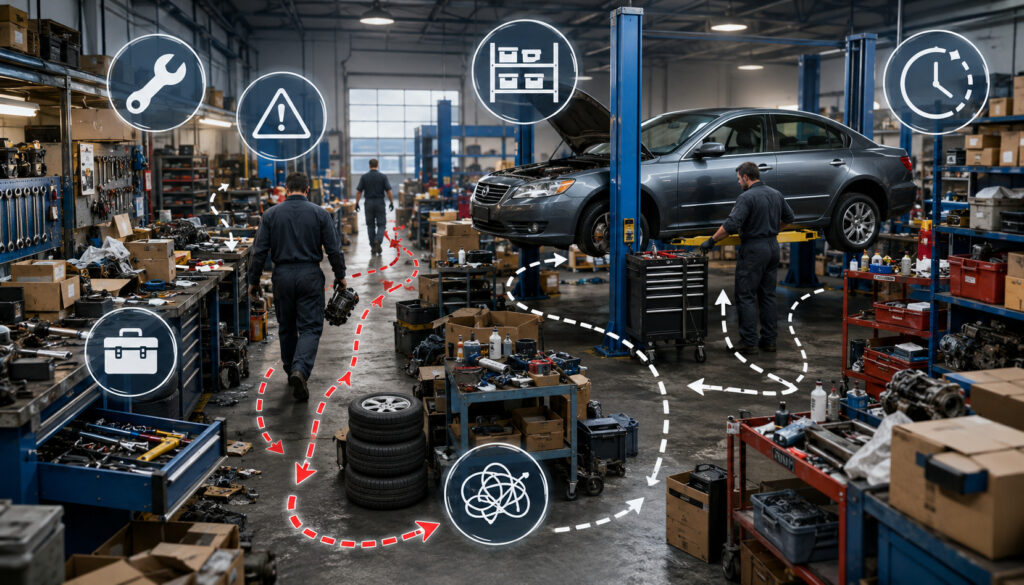
A workshop layout often needs improvement when small problems show up every day. These issues may seem normal because the team has adapted to them, but they usually point to hidden workflow bottlenecks.
One common sign is excessive walking. If technicians repeatedly cross the shop for scan tools, oil filters, fasteners, specialty tools, fluids, or printer access, the layout is pulling them away from productive work. Another warning sign is vehicle congestion. If cars block each other, wait in drive lanes, or must be moved several times before work begins, vehicle flow needs attention.
Parts delays are another clue. Sometimes the parts are available, but they are stored in the wrong location, not labeled clearly, or mixed with returned parts and special-order parts. This creates searching time and can delay job completion.
Poor staging is also a major problem. Vehicles waiting for approval, waiting on parts, waiting for quality check, or ready for pickup should not be mixed randomly. Without clear job staging areas, service advisors, technicians, and managers may not know which vehicles are ready to move forward.
Other signs include:
- Crowded walkways or blocked exits
- Poor lighting around inspection or detailing areas
- Shared equipment conflicts
- Tools left on benches or floors
- Fluids and hazardous materials stored inconsistently
- Customers walking too close to active work zones
- Completed vehicles occupying repair space
- Technicians waiting for lifts, chargers, or tire equipment
Core Principles of Workshop Layout Design
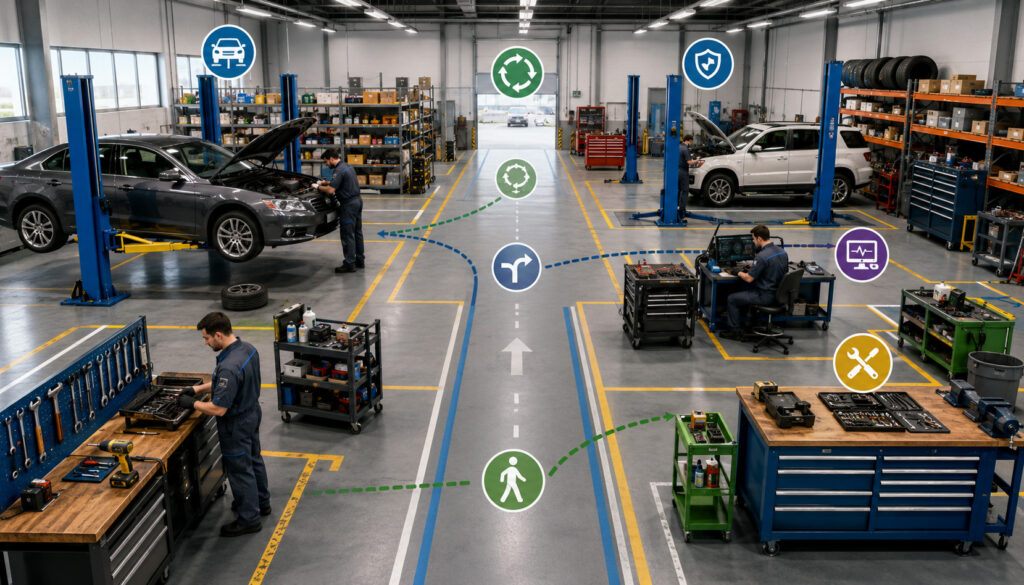
Good workshop layout design follows a few core principles. The first is clear flow. Vehicles should move through the workshop with as little backtracking as possible. Ideally, a job moves from drop-off to inspection, service bay, quality control, wash bay or detailing bay if needed, completed staging, and customer pickup.
The second principle is logical zoning. A workshop should have defined work zones such as inspection area, diagnostics, general repair, tire service area, alignment, detailing bay, parts room, tool storage, dispatch area, hazardous material storage, customer waiting area, and completed vehicle staging. These zones do not always need walls, but they should be clear to employees.
The third principle is access. Technicians need easy access to tools, parts, power, air lines, lifts, computers, and shared equipment. Equipment placement should be based on frequency of use, safety requirements, and workflow, not simply where space happens to be available.
The fourth principle is visibility. Visual management helps the team understand job status, safety zones, traffic flow, tool locations, and inventory storage. Floor markings, signs, labeled shelves, job boards, and color-coded staging areas can make the shop easier to manage.
Flow Before Furniture
One of the most important workshop layout optimization strategies is to plan movement before placing equipment. Many owners start with lifts, benches, cabinets, and machines. A better approach is to first map the movement of vehicles, technicians, parts, tools, and information.
For example, if every repair order starts at the service advisor desk, moves to inspection, then waits for approval, the layout should support that path. If tire jobs require frequent movement between tire storage, mounting, balancing, and alignment, those areas should be close enough to reduce repeated trips.
Flow planning also prevents expensive mistakes. A lift placed in the wrong location may block door swing, reduce technician access, or create awkward vehicle movement. A parts room placed too far from active bays may look organized but still slow down work.
Safety Before Speed
Speed matters, but safety must come first. Safety zones, clear walkways, lift clearance, ventilation, electrical planning, fire safety, spill control, and hazardous material storage should be considered before trying to maximize output. A cramped layout may appear productive at first, but it can increase risk and create long-term problems.
Workshops should review applicable safety guidance from qualified professionals. OSHA provides information for autobody repair and refinishing hazards, including chemical hazards, dust, fumes, welding, lifts, cutting tools, and walking surfaces through its autobody repair and refinishing resources.
Layout decisions should also consider fire exits, electrical access, first-aid areas, eyewash stations where needed, and safe storage for flammable or hazardous materials.
Workshop Layout Optimization Table
The table below summarizes common layout areas, typical problems, practical optimization strategies, and the business impact of improving each area.
| Layout Area | Common Problem | Optimization Strategy | Business Impact |
| Customer drop-off | Vehicles arrive with no clear parking or key process | Mark drop-off spaces, add key drop instructions, and connect check-in to the service advisor desk | Faster intake and better customer experience |
| Inspection area | Inspections happen wherever a bay is open | Create a defined inspection area with lighting, tablets, forms, and basic tools | More consistent inspections and faster estimates |
| Service bays | Bays are blocked by inactive vehicles | Use bays for active work and move stalled jobs to staging | Better bay utilization and shop capacity |
| Tool storage | Technicians search for shared tools | Use labeled storage, shadow boards, and checkout rules | Less wasted time and fewer lost tools |
| Parts storage | Fast-moving parts are too far from work areas | Store high-use filters, fluids, hardware, and supplies closer to bays | Faster repair completion and better inventory control |
| Job staging area | Waiting vehicles are mixed together | Separate waiting-on-parts, waiting-on-approval, quality check, and completed vehicles | Clearer workflow and fewer bottlenecks |
| Tire service area | Tire storage, mounting, balancing, and alignment are disconnected | Group tire-related functions where possible | Faster tire service and less heavy lifting |
| Detailing bay | Wash, drying, polishing, and pickup overlap | Separate wet and dry processes with proper drainage and lighting | Better finish quality and safer movement |
| Hazardous storage | Fluids, chemicals, and waste are stored inconsistently | Use labeled, approved storage areas and follow applicable guidance | Safer operations and cleaner work areas |
| Dispatch area | Job status is unclear | Use a visible board or digital workflow dashboard | Better communication and faster decisions |
Mapping Vehicle Flow Through the Workshop
Vehicle flow is one of the most important parts of workshop layout optimization. A vehicle should move through the shop in a logical sequence, not bounce between random parking spots, bays, and holding areas.
A simple flow might look like this: customer drop-off, intake, inspection area, estimate approval, repair bay, quality check, wash bay or detailing bay, completed vehicle staging, payment, and pickup. Not every shop needs every step, but every shop needs a defined process.
The goal is to reduce reverse movement. If a vehicle enters the shop, receives an inspection, then must be backed out and moved across the lot to wait for approval, that may be unavoidable in some facilities. But if it happens constantly, the layout may need a dedicated job staging area. Vehicles should not block active bays, drive lanes, lifts, or customer access points.
Customer vehicles should also be separated from active work areas. Customers should not walk through service bays to reach the office, waiting area, or pickup point. Clear signage, marked parking, and defined office entrances help create a safer and more professional experience.
Vehicle flow also matters for specialty work. Collision repair shops may need separate paths for estimating, teardown, body repair, paint preparation, paint booth access, reassembly, quality control, and delivery. Tire shops may need a faster loop for mount, balance, alignment, and pickup. Detailing businesses need careful wet and dry area separation.
A simple example helps: if a brake inspection requires pulling a vehicle onto a lift, waiting for customer approval, then moving it to another bay after parts arrive, the shop should define where that vehicle waits during approval. Without a rule, it may sit on the lift and block the next job.
Designing Efficient Service Bay Layouts

Service bay layout has a direct effect on technician productivity, repair cycle time, and safety. A productive bay gives the technician enough room to open doors, move around the vehicle, use a tool cart, access parts, connect diagnostic equipment, and work safely under or around the vehicle.
Lift placement is central to service bay layout. Lifts should allow proper vehicle positioning, safe technician access, and enough clearance for doors, tool carts, drain pans, transmission jacks, and under-vehicle work. A bay that is too tight may slow the technician and increase the chance of vehicle damage or injury.
Power, air, lighting, and data access should also be planned around actual work. Diagnostic bays may need scan tool access, battery support, laptops, charging stations, and strong lighting.
General repair bays may need fluid handling, air lines, drain equipment, and parts carts. Fabrication or welding areas may need additional ventilation, fire safety planning, and separation from clean work zones.
Lift Placement and Clearance
Lift placement affects more than where the vehicle sits. It affects door opening space, technician reach, tire removal, under-vehicle access, parts delivery, and movement around the bay.
Crowding lifts can reduce productivity because technicians must constantly reposition tools, squeeze around vehicles, or wait for space to open.
When reviewing lift placement, consider vehicle size variety. A bay that works for compact vehicles may feel tight with trucks, vans, or fleet vehicles. Also consider whether technicians can safely move equipment such as oil drains, jacks, stands, wheel dollies, or battery chargers around the lift.
Clearance should also include overhead height, lighting placement, garage door position, and nearby storage. Avoid placing cabinets, benches, or large equipment where they limit safe movement around raised vehicles.
Shared Equipment Access
Shared equipment should be placed where it supports workflow without creating traffic conflicts. Tire changers, balancers, alignment machines, scan tools, welders, compressors, battery chargers, A/C machines, and fluid equipment can become bottlenecks if they are hard to access.
The best location depends on frequency of use and safety requirements. Tire equipment should usually sit near tire storage and vehicle staging. Diagnostic tools should be easy to check out and return. Compressors should be located for safe operation and noise control while still supporting air needs.
Creating Clear Work Zones
Clear work zones help employees understand where each activity belongs. This is especially important as a shop grows. Without defined work zones, inspection, repair, storage, cleaning, parts returns, customer pickup, and waste handling can overlap in ways that create confusion.
Common work zones include inspection area, diagnostics area, general repair bays, tire service area, alignment bay, detailing bay, wash bay, parts room, tool storage, dispatch area, customer waiting area, office, hazardous material storage, and completed vehicle staging. Each zone should have a purpose.
Work zones can be marked with floor paint, signs, labels, cones, racks, digital boards, or simple procedures. The goal is not to make the shop feel rigid. The goal is to make work easier to see and manage.
For example, a waiting-on-parts zone prevents inactive vehicles from occupying active service bays. An inspection area helps technicians perform consistent checks before estimates are written. A quality control area gives managers a place to verify repairs before customer pickup.
In collision repair, clean and dirty zones matter even more. Sanding, welding, paint preparation, parts storage, reassembly, and detailing should be arranged to reduce contamination and rework. In detailing, wet wash work should not interfere with dry polishing, interior cleaning, or final inspection.
Clear zoning also supports training. New employees learn faster when the physical layout tells them where tools, parts, jobs, and vehicles belong.
Tool Storage and Technician Productivity
Tool storage has a major effect on technician productivity. Technicians lose time when they search for tools, borrow from each other, walk across the shop repeatedly, or discover that shared tools are missing. Good tool storage reduces searching, waiting, and interruptions.
High-use tools should be close to the work area. Specialty tools can be stored in a central tool room, but they should be labeled, easy to check out, and returned consistently. Shared tools may work well on shadow boards, labeled shelves, locked cabinets, or digital checkout systems depending on shop size.
Tool carts can improve flexibility. A technician can keep job-specific tools close to the vehicle instead of walking back to a fixed bench. Mobile carts are especially helpful in smaller shops, multi-use bays, and diagnostic work.
5S Workplace Organization
5S workplace organization is a practical method for keeping work areas clean, organized, and consistent. It stands for sort, set in order, shine, standardize, and sustain. In a workshop, that means removing unnecessary items, giving every tool a clear home, cleaning work areas regularly, creating repeatable storage rules, and maintaining the system over time.
The value of 5S is not appearance alone. It helps technicians find what they need quickly. It also makes missing tools, spills, clutter, and safety issues easier to spot. A clean and organized bay supports accuracy and reduces frustration.
A simple 5S example is a shared brake service cart. The cart might include common sockets, caliper tools, brake cleaner storage, gloves, measuring tools, and labeled spots for each item. When something is missing, the empty space is visible.
Reducing Technician Walking Time
Reducing technician walking time is one of the simplest ways to improve workshop efficiency. Every unnecessary trip to the parts room, office, printer, tool room, or storage rack adds friction to the day. The goal is not to eliminate movement completely. The goal is to reduce movement that does not help complete the repair.
Start by observing one repair type, such as an oil change, brake job, tire service, diagnostic inspection, or detailing appointment. Count how many times the technician leaves the bay and why. Common reasons include missing parts, unclear work orders, shared tool access, customer approval delays, or equipment placement.
Small layout changes can make a real difference. Move fast-moving supplies closer to bays. Add a printer near the dispatch area. Place tablets or inspection tools where inspections begin. Create a parts delivery shelf near active bays.
Parts Storage and Inventory Placement
Parts storage should support fast, accurate, and controlled repair completion. A parts room that looks organized but slows technicians is not fully optimized. The layout should separate fast-moving inventory, special-order parts, tires, fluids, filters, hardware, returned parts, warranty parts, and customer-supplied items when applicable.
Fast-moving inventory should be easy to access and clearly labeled. Filters, wiper blades, bulbs, common fluids, drain plugs, shop supplies, and hardware may belong closer to active work areas, depending on shop size. Special-order parts should be tied to repair orders and staged in a way that prevents confusion.
Tire storage needs special attention because tires are bulky, heavy, and seasonal demand can change quickly. Tire shops and general repair shops that handle tires should plan storage racks, safe lifting methods, clear labeling, and proximity to mounting and balancing equipment.
Returned parts and warranty parts should not be mixed with usable inventory. If they are, the shop may waste time searching or accidentally install the wrong component. A separate returns area helps the parts process stay clean.
Inventory storage also affects cash flow. Poor parts control can lead to over-ordering, lost parts, duplicate purchases, and delayed credits. A clear parts room layout supports better counts, faster reconciliation, and improved operating costs.
Job Staging and Work-in-Progress Areas
Job staging areas help control work-in-progress. Without staging, vehicles may sit in the wrong place, block active work, or create confusion about job status. A good staging system shows what is waiting, what is approved, what is delayed, what is ready for quality check, and what is completed.
Common staging categories include incoming vehicles, waiting for inspection, waiting for approval, waiting on parts, approved and ready for repair, quality check, wash or detailing, completed, and customer pickup. The exact categories depend on the shop, but the idea is the same: every vehicle should have a known status and a proper place.
Staging matters because inactive vehicles can quietly reduce capacity. A car waiting on a special-order part should not sit on a lift if another approved job is ready. A completed vehicle should not remain in a service bay while the customer arrives hours later. These situations reduce bay utilization and can delay revenue.
Staging also improves communication. Service advisors can see which jobs need customer approval. Technicians can see which vehicles are ready. Managers can identify workflow bottlenecks before they become end-of-day problems.
Digital workflow boards can support staging, but the physical layout still matters. A digital board may say a vehicle is waiting on parts, but the shop still needs a place to put that vehicle without blocking work.
For shops using digital inspections, resources on digital vehicle inspection workflow can support better communication between inspection, approval, repair, and pickup stages.
Customer Drop-Off and Pickup Layout
Customer-facing layout affects trust before any repair begins. Customers notice whether parking is clear, signage is understandable, the entrance is easy to find, the service advisor desk is accessible, and the waiting area feels organized. A confusing front-end layout can make even a skilled shop feel chaotic.
Customer drop-off should include marked spaces, clear instructions, safe walking paths, and a direct route to the service advisor desk or key drop. If after-hours drop-off is offered, the key drop area should be easy to locate and protected from confusion. Customers should know where to park, where to leave keys, and what to expect next.
The service advisor desk should support communication. Advisors need access to repair orders, inspection notes, estimates, customer history, payment tools, and shop status. If the desk is physically disconnected from the shop floor, communication routines become even more important.
Pickup should be just as organized as drop-off. Completed vehicles should be staged in a clearly identified area. Customers should not have to search for their vehicle or wait while staff move multiple cars. Payment stations, checkout flow, and final explanation space should support a smooth handoff.
A customer waiting area does not need to be large, but it should be clean, safe, and separated from active repair zones. Even a compact waiting area can feel professional if seating, lighting, restrooms, Wi-Fi, and service updates are handled well.
Safety Zones and Compliance Planning
Safety zones are essential in workshop layout optimization. A productive shop must also be a safe shop. Layout decisions should protect technicians, customers, vendors, and visitors from avoidable risks.
Important safety planning areas include walkways, fire exits, electrical panels, eyewash stations where needed, first-aid areas, spill kits, lift zones, compressed air, welding areas, hazardous material storage, ventilation, battery charging areas, and floor markings. These areas should remain visible and accessible.
OSHA identifies several hazards in autobody and repair environments, including chemical exposure, sanding dust, welding fumes, repetitive stress, noise, lifts, cutting tools, and slippery walking surfaces.
OSHA also lists standards related to hazardous materials, flammable liquids, spray finishing, personal protective equipment, respiratory protection, fire extinguishers, machinery, electrical systems, and hazard communication in its autobody standards guidance.
This article is informational and should not be treated as formal compliance advice. Requirements can vary by operation, location, building type, employee count, chemicals used, and services performed. Workshop owners should consult qualified safety, fire, insurance, and compliance professionals when designing or changing a facility.
Fire safety also matters in layout planning. Keep exits clear, separate flammable materials appropriately, store chemicals correctly, and avoid placing hot work near combustible materials. Fabrication, welding, paint, and detailing operations may need additional planning because of fumes, sparks, chemicals, and ventilation needs.
Lighting, Ventilation, and Ergonomics
Lighting, ventilation, and ergonomics have a direct impact on accuracy, speed, safety, and technician comfort. Poor lighting can cause missed leaks, incorrect inspections, paint finish issues, detailing mistakes, and technician fatigue.
Strong lighting is especially important in inspection areas, detailing bays, alignment areas, paint preparation areas, and under-vehicle work.
Ventilation supports air quality and comfort. Repair shops may deal with exhaust, solvents, welding fumes, dust, aerosols, cleaning chemicals, and detailing products.
Collision repair and refinishing areas need special attention because sanding, spraying, and chemical handling can create hazards. Qualified professionals should review ventilation needs based on the work performed.
Ergonomics is also part of workshop efficiency. Workstations should reduce unnecessary bending, reaching, twisting, and lifting. Tool storage should keep frequently used items within comfortable reach. Tire shops should consider safe tire handling and lifting methods. Detailers need proper workstation height, lighting angles, drainage, and chemical access.
Floor condition matters too. Slippery, cracked, cluttered, or uneven floors slow movement and increase risk. Clear walkways, floor markings, and routine cleaning help maintain safer traffic flow.
Noise and temperature control also affect technician performance. A shop that is too loud, too hot, too cold, or poorly ventilated can increase fatigue and turnover. Employee comfort is not a luxury. It supports concentration, retention, and consistent workmanship.
For workplace health and safety information related to noise, ergonomics, and exposure controls, the National Institute for Occupational Safety and Health provides educational resources that can help owners think more carefully about worker protection.
Equipment Placement Strategies
Equipment placement should be based on workflow, frequency of use, safety, and access. A common mistake is placing equipment wherever there is open space. That may solve an immediate storage issue but create long-term movement problems.
Lifts should be positioned for safe vehicle access, technician clearance, power access, lighting, and workflow. Compressors should be placed with attention to noise, ventilation, maintenance access, and air distribution.
Tire machines should be near tire storage, balancing, and vehicle staging. Alignment racks should have enough approach space and should not block general repair traffic.
Diagnostic stations may need power, data access, battery support, scan tools, service information, and a clean work surface. Welding and fabrication areas may need separation from flammable materials, proper ventilation, and fire safety planning. Wash equipment should be placed where water flow, drainage, slip prevention, and drying areas can be managed safely.
Fluid systems should be located for safe dispensing, spill control, and convenient service. Storage racks should not block lighting, exits, electrical panels, or traffic lanes. Charging stations for electric tools, batteries, tablets, and diagnostic equipment should be organized to avoid cords across walkways.
| Equipment or Area | Best Placement Consideration | Common Mistake | Optimization Tip |
| Vehicle lifts | Clearance, door swing, under-vehicle access, and traffic flow | Crowding lifts too close together | Test movement around the largest vehicles you service |
| Tire changer and balancer | Close to tire storage and tire service bays | Placing tire equipment far from inventory | Group tire work into one efficient zone |
| Alignment rack | Straight approach, space for adjustments, and easy staging | Blocking drive lanes or general repair bays | Create a dedicated alignment flow |
| Compressor | Noise control, ventilation, and maintenance access | Hiding it where service access is difficult | Plan air line routing before final placement |
| Diagnostic station | Power, data, battery support, and clean workspace | Sharing one station across too many areas | Keep diagnostic tools near inspection and testing bays |
| Parts room | Inventory control and quick technician access | Mixing returns with usable parts | Separate fast-moving, special-order, and return shelves |
| Wash bay | Drainage, water access, slip control, and drying path | Letting wet work overlap with clean delivery areas | Separate wet, dry, and final inspection zones |
| Hazardous storage | Fire safety, labeling, containment, and access control | Storing chemicals in random corners | Use a designated, labeled storage area |
| Customer waiting area | Separation from work zones and easy advisor access | Placing customers near noise or vehicle movement | Keep customer paths simple and safe |
Small and Large Workshop Layout Optimization
Small workshops need disciplined space management. Limited square footage makes clutter more costly because one poorly placed vehicle or storage rack can block the entire workflow. Small shop optimization often depends on vertical storage, mobile tool carts, wall-mounted cabinets, compact waiting areas, clear staging rules, and multi-use bays.
In a small auto repair shop layout, every bay should have a clear purpose. If a bay must serve multiple functions, define when it is used for inspections, repairs, tires, or diagnostics. Avoid letting parts, tires, customer items, or unused equipment slowly take over active work areas.
Small shops also benefit from scheduled parts delivery and tighter inventory rules. Keeping too much slow-moving inventory can consume valuable space. Store fast-moving items close to work areas and use reliable ordering processes for less common parts.
Large workshops face different challenges. More space can create more walking, more communication gaps, and more hidden bottlenecks. Large shop layout optimization should focus on dedicated zones, internal traffic lanes, dispatch systems, parts delivery routes, supervisor visibility, and digital workflow tracking.
A large facility may need separate departments for diagnostics, general repair, tires, alignment, detailing, collision, quality control, and completed vehicle staging. The advantage is specialization. The risk is poor handoff between departments.
For growing shops, independent repair shop growth planning can help connect facility decisions with staffing, scheduling, customer communication, bay utilization, and profitability.
Whether the shop is small or large, the best layout is the one that supports the actual work mix. A tire-heavy shop should not copy a collision repair layout. A detailing business should not organize space like a general repair facility. Layout should match services, customer volume, vehicle size, staff roles, equipment, and capacity goals.
Layout Strategies by Workshop Type
Different automotive businesses need different workshop layout optimization strategies. A general auto repair shop may focus on diagnostics, preventive maintenance, fluid service, brake work, tire service, and customer pickup. The layout should support inspection, estimate approval, repair, parts access, quality check, and invoicing.
An auto repair shop layout often works best when diagnostic and inspection areas are easy to access near intake. General repair bays should have strong lighting, tool access, parts delivery points, and enough space for lift work. Waiting-on-parts vehicles should be staged away from active bays whenever possible.
Tire shops and wheel service centers need efficient movement between tire storage, mounting, balancing, alignment, and customer pickup. Heavy lifting should be minimized.
Tire inventory should be labeled clearly by size, brand, customer order, and seasonal storage category. The tire service area should reduce repeated walking and avoid mixing customer waiting paths with tire movement.
Detailing and car wash layouts need careful separation between wet and dry work. Washing, drying, polishing, interior cleaning, chemical storage, vacuuming, inspection, and delivery should follow a logical sequence. Lighting is especially important for polishing and final inspection. Drainage, ventilation, and slip prevention should be reviewed carefully.
Collision repair workshop layout is more complex because jobs often move through estimating, disassembly, blueprinting, body repair, paint preparation, paint booth access, reassembly, quality control, detailing, and delivery.
Parts storage must support large components and special-order tracking. Clean zones and dust-producing zones should be separated to reduce rework.
Fabrication and equipment repair workshops may need wider clearance, heavier lifting equipment, welding areas, parts benches, material storage, and stronger safety controls. These layouts should prioritize safe movement, hot work planning, equipment access, and organized material flow.
Using Lean Principles in Workshop Layout Optimization
Lean workshop layout focuses on reducing waste. In a workshop, waste often appears as unnecessary walking, waiting for parts, searching for tools, moving vehicles repeatedly, unclear job status, rework, overstocked inventory, and unused space.
Lean does not have to be complicated. Start by watching how a job moves through the shop. Look for steps that do not add value. For example, if a technician walks to the office three times to clarify repair notes, the issue may be documentation, dispatch flow, or workstation access. If vehicles are moved repeatedly before work begins, the issue may be staging.
Visual management is a practical lean tool. A workflow board can show which vehicles are waiting for inspection, approval, parts, repair, quality check, or pickup. Floor markings can show where vehicles belong. Labeled tool boards can show when tools are missing. Color-coded shelves can separate special-order parts from returns.
Standardization also helps. If every technician stores shared tools differently, searching becomes normal. If every service advisor stages vehicles differently, confusion grows. Standard work does not remove judgment. It creates a consistent foundation so people can make better decisions.
Digital Tools for Workshop Layout and Workflow
Digital tools can support workshop layout optimization by making workflow easier to see. Shop management software, digital inspections, scheduling systems, inventory tools, time tracking, payment reports, and workflow dashboards can reveal where delays occur.
For example, if repair orders often wait several hours between inspection and approval, the issue may not be the bay layout alone. It may involve service advisor capacity, estimate writing, customer communication, or approval workflow. If jobs frequently stop after parts ordering, the issue may be parts room placement, vendor delivery, inventory control, or special-order tracking.
Digital vehicle inspections can improve communication between technicians, advisors, and customers. Photos, notes, and categorized recommendations help customers understand needed repairs. This can reduce approval delays and help vehicles move forward faster.
Scheduling tools can help match appointments to shop capacity. A layout cannot perform well if the schedule overloads one work type while underusing another. For example, too many diagnostics at once can bottleneck senior technicians, while too many tire jobs at once can overload shared tire equipment.
Cloud systems can also help multi-location operators compare performance across facilities. Resources on cloud software for automotive businesses can help owners understand how digital systems support operations, reporting, and communication.
Digital workflow should not replace physical organization. A dashboard may show job status, but the shop still needs marked staging areas, organized parts shelves, accessible tools, and clear customer flow.
KPIs to Track After Layout Changes
Workshop layout optimization should be measured. Without KPI tracking, owners may rely on opinions instead of evidence. The best KPIs show whether layout changes are improving workflow, productivity, and customer experience.
Bay utilization is a key metric. It shows whether service bays are being used for active work or occupied by stalled vehicles. High utilization is good only when bays are productive. A full shop with vehicles waiting on approval may look busy but operate poorly.
Repair cycle time measures how long it takes a vehicle to move from intake to completion. If layout changes reduce waiting, walking, and staging confusion, repair cycle time should improve.
Technician productivity and labor efficiency are also important. These metrics help show whether technicians are spending more time on billable work and less time searching, waiting, or moving.
Other useful KPIs include:
- Vehicles completed per day
- Average repair order
- Comeback rate
- Parts delay frequency
- Waiting-on-approval time
- Customer wait time
- Customer satisfaction
- Labor hours billed per technician
- Stalled vehicles by stage
- Equipment downtime
- Inventory accuracy
Financial teams should also watch operating costs, overtime, parts carrying costs, and gross profit trends. Layout changes may improve profitability by increasing completed work, reducing wasted time, and improving inventory control.
For business owners building a measurement routine, automotive performance resources such as benchmarking and KPI guides can help connect layout performance with broader management decisions.
The Small Business Administration also provides general educational material on business planning and operations that can help owners think through capacity, costs, and growth planning.
Common Workshop Layout Mistakes
Many workshop layout mistakes happen because decisions are made reactively. A shop buys equipment and places it where space is open. Parts overflow into unused corners. Vehicles wait wherever they fit. Tools move from one bench to another. Over time, the shop becomes harder to manage.
One common mistake is ignoring vehicle flow. If vehicles must be moved multiple times before work starts, the shop loses time and increases the chance of damage or confusion. Another mistake is overloading service bays. A bay should not become storage for parts, tires, tools, inactive vehicles, or customer belongings.
Storing parts too far from technicians is another issue. A distant parts room may look clean, but if technicians constantly walk back and forth for common items, productivity suffers. Poor lighting is also common, especially in inspection, detailing, and quality control areas.
Space Planning Mistakes
Space planning mistakes include crowding lifts, ignoring door swing, blocking exits, mixing clean and dirty work areas, and underestimating storage needs. These mistakes often appear after the shop becomes busier.
For example, a lift may appear to fit on paper, but once a truck is raised, the technician may not have enough room for tool carts, drain equipment, or safe movement. A detailing bay may seem adequate until wet work interferes with final delivery. A collision shop may underestimate how much room is needed for removed parts, bumpers, panels, and reassembly.
Good space planning includes clearance, traffic lanes, storage, safety zones, and future flexibility.
Workflow Mistakes
Workflow mistakes include unclear job status, poor dispatch flow, parts bottlenecks, shared equipment conflicts, and vehicles moving backward through the shop. These mistakes slow down production even when the physical space is large.
A common example is placing tire equipment in one corner, tire inventory in another, and alignment in a third. Each job requires repeated trips and vehicle movement. Another example is keeping the service advisor desk disconnected from shop status, forcing constant interruptions.
The best fix is to map the process, identify repeated delays, and adjust the layout around real work rather than assumptions.
Workshop Layout Optimization Checklist
Use this checklist to review your current layout and prioritize improvements:
- Vehicle flow is mapped from drop-off to pickup.
- Customer parking and key drop are clearly marked.
- Service bays are reviewed for clearance and active use.
- Tool storage is organized and labeled.
- Shared tools have a checkout or return process.
- Parts storage separates fast-moving, special-order, return, and warranty items.
- Tire storage is safe, labeled, and close to tire service when possible.
- Job staging areas are marked by status.
- Waiting-on-parts vehicles do not block active bays.
- Quality check and completed vehicle areas are defined.
- Walkways are clear and safe.
- Fire exits and electrical panels are accessible.
- Lighting is reviewed in inspection, repair, and detailing areas.
- Ventilation is reviewed for the work performed.
- Hazardous material storage is designated and labeled.
- Equipment placement is evaluated by frequency of use.
- Customer drop-off and pickup are easy to understand.
- Service advisor communication with the shop floor is clear.
- Technician feedback is collected.
- Workflow bottlenecks are identified.
- KPIs are tracked after layout changes.
Best Practices for Workshop Layout Optimization
The best workshop layout optimization strategies start with observation. Watch how work actually moves through the shop. Do not rely only on how the process is supposed to work. Real workflow will show where vehicles wait, where technicians walk, where tools disappear, and where customers get confused.
Involve technicians, service advisors, parts staff, detailers, and managers. Each group sees different problems. Technicians may notice tool and equipment issues. Advisors may notice drop-off, approval, and pickup delays. Parts staff may notice inventory confusion. Managers may notice bay utilization and staffing bottlenecks.
Use floor markings and visual management. Mark staging zones, walkways, safety zones, tire areas, completed vehicle spaces, and hazardous storage areas. Label shelves, carts, cabinets, and shared tools. A visible system is easier to follow.
Organize tools and parts by frequency of use. High-use items should be closer to work areas. Low-use items can be stored farther away as long as they are labeled and accessible. Keep parts rooms clean, separate returns, and avoid using service bays as storage.
Improve one area at a time. A full redesign can be expensive and disruptive. Many shops get better results by fixing the biggest workflow bottleneck first, then tracking results. Start with staging, tool storage, parts placement, lighting, or shared equipment access.
Finally, review the layout regularly. A layout that worked for a two-bay shop may not work for a six-bay shop. A layout designed for general repair may not work after adding tires, detailing, fleet service, or collision repair. As the business changes, the layout should change with it.
What is workshop layout optimization?
Workshop layout optimization is the process of organizing a workshop floor plan so vehicles, technicians, tools, parts, equipment, customers, and information move through the business efficiently and safely. It includes service bay layout, vehicle flow, equipment placement, job staging, parts storage, tool organization, customer drop-off, pickup flow, and safety zones.
The goal is to reduce wasted time, prevent blocked work areas, improve technician productivity, and support better customer experience. It also helps owners use space more effectively without assuming that the only solution is adding more square footage.
Why is workshop layout design important?
Workshop layout design is important because it affects daily performance. A poor layout can make technicians walk too far, wait for shared tools, search for parts, move vehicles repeatedly, or work in crowded bays. These delays reduce workshop productivity and can increase repair cycle time.
A better layout supports smoother workflow, safer movement, clearer job status, faster approvals, better parts control, and more productive service bays. It also helps customers experience a more organized drop-off and pickup process.
How do you plan a workshop layout?
Start by mapping the current workflow from customer drop-off to inspection, approval, repair, quality check, and pickup. Then identify where work slows down. Look for blocked vehicles, long walks, parts delays, unclear staging, poor lighting, shared equipment conflicts, and safety concerns.
Next, group related activities together. Keep tools and parts near the work that uses them most. Create clear zones for inspection, repair, tires, detailing, parts, storage, waiting-on-parts vehicles, completed vehicles, and customer areas. Test small changes before committing to expensive moves.
What is the best layout for an auto repair shop?
The best auto repair shop layout depends on services, building size, vehicle volume, technician count, equipment, and customer flow. A general repair shop usually needs clear intake, inspection, general repair bays, diagnostics, parts storage, tool storage, waiting-on-parts staging, quality check, and completed vehicle pickup.
There is no single best layout for every shop. A tire-heavy shop needs a different setup than a diagnostic shop or collision repair facility. The best layout is the one that reduces bottlenecks and supports the shop’s actual work mix.
How can a small workshop improve layout efficiency?
A small workshop can improve layout efficiency by using vertical storage, mobile tool carts, wall-mounted racks, clear staging rules, compact customer areas, and multi-use bays. The key is to prevent clutter from taking over active work areas.
Small shops should avoid storing inactive vehicles, tires, unused equipment, or excess inventory in service bays. They should also keep high-use tools and parts close to technicians and use simple visual labels so everything has a clear place.
What are the most important workshop zones?
Important workshop zones include customer drop-off, service advisor desk, inspection area, diagnostic area, general repair bays, tire service area, alignment bay, detailing bay, wash bay, parts room, tool storage, hazardous material storage, job staging area, quality control area, completed vehicle area, and customer pickup.
Not every workshop needs every zone, but every shop needs clearly defined spaces for intake, active work, waiting jobs, storage, safety, and delivery. Clear zones reduce confusion and help the team manage work-in-progress.
How does layout affect technician productivity?
Layout affects technician productivity by controlling how much time technicians spend on repair work compared with walking, searching, waiting, and moving vehicles. If tools, parts, equipment, and information are hard to access, technicians lose productive time.
A good layout keeps high-use tools nearby, organizes shared equipment, reduces unnecessary walking, improves lighting, and prevents inactive vehicles from blocking bays. These changes help technicians complete work more efficiently and with less frustration.
How does bay utilization relate to layout?
Bay utilization measures how effectively service bays are used. Layout affects bay utilization because poor staging, blocked vehicle flow, and unclear job status can cause inactive vehicles to occupy repair bays. A full bay is not always a productive bay.
Better layout planning keeps active jobs in service bays and moves waiting-on-parts, waiting-on-approval, and completed vehicles to proper staging areas. This helps the shop increase usable capacity without necessarily adding more bays.
What layout mistakes should workshops avoid?
Workshops should avoid crowding lifts, blocking exits, placing equipment only where space is available, storing parts far from technicians, mixing clean and dirty work areas, ignoring vehicle flow, and using active bays as storage.
They should also avoid unclear staging areas, poor lighting, weak customer drop-off flow, shared equipment bottlenecks, and failing to ask technicians for feedback. These mistakes can reduce productivity and create safety concerns.
How can tool storage improve workflow?
Tool storage improves workflow by reducing searching, borrowing, and walking. When tools have clear locations, technicians can find what they need quickly and return items consistently. Shared tools should be labeled and easy to track.
Tool carts, shadow boards, labeled drawers, central tool rooms, and checkout systems can all help. The best system depends on shop size and service mix, but the principle is the same: high-use tools should be easy to access, and missing tools should be easy to spot.
What KPIs should be tracked after layout changes?
Useful KPIs include bay utilization, repair cycle time, technician productivity, labor efficiency, vehicles completed per day, parts delay frequency, waiting-on-approval time, comeback rate, customer wait time, customer satisfaction, average repair order, and operating costs.
Track results before and after layout changes. This helps owners know whether a new staging area, tool system, parts room change, or equipment move is actually improving performance.
Conclusion
Workshop layout optimization is one of the most practical ways to improve the performance of an automotive workshop. It helps vehicles move smoothly, technicians work more efficiently, parts stay organized, equipment remain accessible, and customers experience a clearer drop-off and pickup process.
The best approach is to start with the real workflow. Watch where vehicles get blocked, where technicians lose time, where parts delays happen, where shared equipment creates conflict, and where customer movement feels confusing. Then make focused improvements that solve the biggest bottlenecks first.
A better layout does not always require a bigger building. Many improvements come from clearer staging zones, smarter tool storage, better parts placement, improved lighting, safer walkways, organized customer flow, and stronger visual management.
Keep measuring results with KPIs such as bay utilization, repair cycle time, technician productivity, parts delays, customer satisfaction, and operating costs.
As the shop grows, continue refining the layout. A workshop that reviews space regularly, listens to staff, tracks performance, and improves one area at a time is better positioned to increase efficiency, safety, customer trust, and long-term profitability.